Sunday, March 31, 2013

Olio di Argan Conditioner Review

Olio di Argan Ingredients: aqua/water, cetearyl alcohol, cetrimonnium chloride, parfum/fragrance, argania spinosa oil, hydroxypropyl oxidized starch pg-trimonium chloride, citric acid, linalool, sodium lactate, sodium chloride, lactic acid, benzoic acid

I use argan oil on my hair in light amounts and I like that it helps prevent my hair from getting dry while adding a touch of shine. I am always on the lookout for products with argan oil in the ingredient list among other nourishing oils and beneficial botanicals.

This argan oil conditioner was purchased at HomeSense for $6.99 and the suggested retail price is $15.00, it is from Italy and is made with pure argan oil.

On the back of the bottle there is a description about the process involved in extracting oil from argan trees but it fails to thoroughly describe what the product will do for the hair except for adding shine and silkiness. It also does not suggest what hair type it is targeted at.

The good thing about this conditioner is that it does not contain any parabens, silicones  artificial coloring or mineral oil.

The consistency of the conditioner is rather thin, too thin for it to really coat my hair and when applying it, it feels very watery and light. I have to apply a lot of the conditioner to get any accumulation of it on my hair and it does not aid in detangling. It does have a nice perfume scent and you can pick up a hint of argan.

I think this conditioner would be best for thin, fine hair textures that are prone to being easily weighed down with medium to heavy conditioners. I do not think it is well suited for thick hair, curly hair, or coarse hair types.

This conditioner did not provide adequate moisture and did very little to condition my hair. It also did not provide the shine it claimed it would.


Saturday, March 30, 2013

Purple and pink nails


Purple and pink are my favorite colors and since its spring and Easter I wanted to do something colorful and with an accent nail.
To get this look I used:
Color Essence Ultimate Pink
Wet n Wild On a Trip
NYC long wear Stary Silver Glitter 


KleanColor Nail Lacquer Review


 I bought these nail lacquers because I thought the bright neon colors would look great for a summer mani or pedi. I was especially drawn to the neon green and yellow thinking that they would really pop on bright sunny days.

These nail lacquers were very hard to work with. The formula was thin and the polish went on very transparent. The neon yellow and lime colors were the worst. I needed several heavy coats before the polish would show true to its color and even then it took a very long time to dry. The thickness of the coats I had to apply caused the polish to crease and indent on everything I touched making my manicure look messy and unappealing.

The only colors that I had some luck with were the pink and purple/pink colors. Although they too had a thin watery consistency I managed to achieve a pretty decent pedicure using these colors.

Since these are mini bottles the brush was small making it difficult to apply the polish.

 I will not be purchasing anything in this particular line of nail lacquer again. 

Thursday, March 28, 2013

Hemp Seed Oil for Skin & Hair

Raw hemp seeds

Hemp oil facts:
Hemp oil is produced by pressing the raw seeds of the hemp plant; in this form it is completely legal and is used in many cosmetic and beauty products.

Here are some other quick facts about the benefits of hemp oil:

*High in Polysaturated fatty acids 
*High in protein 
*Contains omega 6 and 3
*Contains antioxidants and vitamin e
*Contains potassium, magnesium, iron, zinc and calcium

For my Skin:
I use hemp oil as a night moisturizer on my face and since using it I have noticed that over time it has helped even out my skin tone and helped to fade some of my blemishes. 

Hemp oil is also a great moisturizer for the skin because it does not clog the pores or cause acne but it does act as a natural moisturizer and helps with skin irritation. 

The enzymes found in hemp oil can be absorbed into the skin to leave the skin very soft. Hemp oil is used in many moisturizers, creams and cosmetics but I purchase the organic oil and use it directly on my skin for the best results. I also use it on my body after I get out of the shower.

I would recommend using the oil on your face and body only during the evening while you are at home and applying it after your shower because although the oil does not clog pores it does tend to leave a greasy feeling on the skin.

For my hair:
I also use hemp oil on my hair. Because of the fatty acids hemp oil is great for nourishing the hair and the high protein content helps strengthen hair. The fatty acids in hemp oil act as an emollient which helps retain moisture and combats dry hair. You can also get the benefits from this oil if you ingest it orally which is also great for your skin and hair.

*note: The oil I purchase for my hair and skin cannot be ingested, if you would like to take the oil orally then you will have to get the kind that is safe to ingest.

Hemp oil has many other medical benefits but I primarily use it for my hair and skin. For my hair I use hemp oil for scalp massages and the oil helps combat dry scalp as well as nourishes my scalp. The act of massaging to promote blood flow and using the oil can aid in hair growth. 

 Sometimes I mix my hemp oil with my conditioner for a deep conditioning treatment or I mix the oil with some raw organic honey for another deep treatment masque. I also occasionally mix my hemp oil with other oils such as coconut oil or grape seed oil. I use hemp oil to seal my ends when I want to prevent dryness and split ends.


I don’t care for the scent of the oil, it smells earthy and a bit like grass but I only use it at night so this isn't a problem.

Where I get my hemp oil and what kind I buy:

I purchase my hemp oil from a store called New Directions Airomatics which is a company that sells many natural oils and extracts. You can find their website at: http://www.newdirectionsaromatics.ca/ they have both a Canadian and America store and you can order their products online. They also have some really great natural shampoos and conditioners. I have used the Poya Rosemary mint conditioner with natural botanicals and it was amazing.

I purchase the unrefined organic hemp oil, unrefined is always better even if you decide to purchase from other organic stores because the oil retains most of its nutritional properties.


Monday, March 25, 2013

How to Apply Mascara, Care for Your Lashes and Help Them Grow


I don’t like wearing false eye lashes but I do love how dramatic and full they look. The problem is I have no patience for applying them and most of them feel heavy and uncomfortable on my lashes. If I have to wear false lashes for a special occasion then I suck it up and glue them on but as soon as I come home I rip them off and toss them in a corner with relief.

Since I don’t care for the feeling of false lashes on my eyelids I have some tricks to work with my natural lashes to enhance their fullness and length. Some have stopped to ask me what I use on my lashes and if my lashes are indeed real. So this post is about how I achieve the fullest and longest looking natural lashes. 

Lash care:

* The first thing I do to help my lashes look their best is to care for them and treat them gently. Even if you like  false lashes laying off them for a while can give your own lashes a well needed break and you won't have to deal with removing lash glue. Sometimes the process of removing the falsies can cause you to lose some of your own lashes and that is never good.

*Every night before I go to bed I apply a thin layer of Vaseline to my lashes. This helps keep them moisturized over night which can help them grow. Applying Vaseline on your lashes may sound weird to some but since I have been doing this I have noticed an improvement in the length of my lashes. Some people prefer to use oils such as castor oil instead of Vaseline but I find that for me Vaseline works best. 

*There are also some cosmetic lines that sell eye lash creams or mascaras that will help lengthen, strengthen and enhance your lashes. If you have short fine lashes you may want to look into this option.

*I am always careful when removing my mascara at night. Mascara tends to make lashes dry, hard and crunchy so rubbing vigorously on your lashes to get it off can cause you to lose more hairs than necessary. I use a gentle eye makeup remover on a makeup cloth and I saturate and press the solution into my lashes until the mascara loosens and becomes soft before gently rubbing it off. You can also use eye makeup removing pads.  


Applying Mascara:

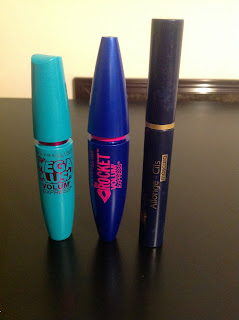
*When applying my mascara I get the best results when I use 3 different mascaras. I usually use my top favorites and they each have different brush types, formulas and are meant to do different things to my lashes.
*When I have chosen my 3 mascaras I begin to build up my lashes. Starting at the base of my lashes and looking down into a mirror I apply the mascara from roots to tips alternating between straight strokes and wiggling my brush back and forth. I find that applying my mascara while looking down into a mirror helps me see my lashes more clearly and tell how much length I am achieving. It also prevent messing up my eye shadow.

e.l.f. 3 in 1 mascara with ball tip
*Sometimes the lashes closest to your inner eyes are the shortest and hardest to reach, for this I use a mascara with a ball tip such as the e.l.f three in one mascara.

*Sometimes I blink into the brush to get the mascara applicator brushed more thoroughly through my lashes.

*I usually make sure the first mascara I apply separates my lashes, that the second mascara plumps or thickens my lashes and that the third mascara lengthens and wraps around my lashes to thicken them up.

*I take my time building up my lashes with each mascara and making sure I get the most from each product.  Sometimes I apply two coats of each mascara but if you have issues with clumping then make sure to use mascaras that don’t clump as easily.

*When I have built up a good foundation I focus my attention on the very tips of my lashes and try to build them up so that they are extended. You can get a false fiber mascara to help with this if you can stand the fibers possibly coming loose and getting into your eyes (which I couldn’t). The L'oreal false fiber lashes is my favorite  fiber mascara. 

Black Radiance Mascara
 I switch up the combinations of mascaras I use frequently but my staple and favorite mascara is the Black Radiance lengthening mascara because this is the mascara that really adheres to my lashes and my other mascaras, thickens them and makes them look very long.

*For those of you who don’t like wearing false lashes but still cannot find the right mascara there is also the option of using half lashes which adhere to the outside lash line only. These lashes are much easier to work with and less of a hassle.  


Thursday, March 21, 2013

Rihanna’s Diamonds Tour Review (March 19 Air Canada Center Toronto)


First let me start off by saying I am a huge Rihanna fan and I think she is currently one of the most successful artists in the music industry. Almost all of her singles are hits and I can hardly turn on the radio without hearing one of her songs. Rihanna has tapped into many genres of music and has adapted  her style so many times I never know what she will look like from day to day.

Getting tickets for the Diamonds Tour was no easy feat. My sister got them as a gift for me and she was kicked out of Ticketmaster several times before she could get the tickets. Both of Rihanna’s Diamonds Tour concerts in Toronto were sold out within minutes.

The seats we got were not the best but they were the best available seats we could get online after battling hoards of other fans who were trying to get any seats they could. My photos are not great because we were too far away to get any good shots of Rihanna and the stage.

 The experience:
Personally I think if you are going to see a live performance then you should feel like you are a part of the concert. You should be able to see the performer clearly and see everything that is going on, onstage. Our seats did not permit me to even make out Rihanna’s face and I couldn't get a clear view of what she was wearing or see any of her stellar dance moves. To get a clear view of her I had to look up at the Air Canada Center’s rather small unimpressive screen to see what was going on. If I wanted to watch Rihanna on a poor quality screen I could have done so from somewhere else. I just don’t think it is worth the money if you can’t really see the performer because that is the whole point of a live performance. Our seats were not even the highest or the worst! So I have no idea what the people in the high balcony seats saw.

Despite the seats the concert was fun, the vibe was amazing and her fans were adoring and energetic. My sister and I had a great time together enjoying the atmosphere downtown, the energy of the crowd and the music.


The venue and sound: 
I have been to concerts at the ACC before and I have to say I am not impressed. The stage is angled awkwardly which results in a very small and unimpressive performing platform. Even When I saw Usher perform here it was the same dinky stage and unfortunately the small stage means a less exciting show. Aside from a few dancers, some fire shooting up a few times from the stage and some blinding lights there were no other special effects. I expected more but this does not mean that Rihanna did not try her hardest to perform with what she had available.

The sound was terrible! It was unnecessarily loud. I know that concerts are supposed to be loud but the sound was loud to the point where the instrumentals sounded like screaming and screeching in my ear. I left a little deafened, but that wore away the next day. Rihanna sang pretty well for someone who had laryngitis and the poor sound quality and acoustics had nothing to do with her but rather the sound technicians poor judgement.

 Rihanna:
Only Rihanna can walk out on stage with half her head shaved and still look beautiful. Although she was hours late and she was recovering from laryngitis she came out and gave it her all. She danced and sang along with her tracks I’d estimate about 60% of the time but she sang the slower songs in their entirety.
All her songs were great because all her songs are hits so there were no boring moments. She tried to engage the crowd and even jumped into the audience to hug, kiss and dance with her fixated followers.  She is a good performer and a talented and creative artist. 


Some of my fav photos that I have taken


Here are a few of the photos I have taken on my travels that I absolutely love!

Click on the photos to scroll through

(sorry about the formatting) I am not sure why the two last pictures repeat, I am trying out this new app.

Sunday, March 17, 2013

Garnier Fructis Hair Care Line: Product Review


For a long time I stayed away from Garnier Fructis products because I had tried their shampoo in the past and it was one of the most drying shampoos I had ever used! My hair felt rough and straw like and I vowed never to buy anything else from this line again.

Walking through the hair products isle at Walmart a few months ago I noticed that Garnier had come out with a lot of new products and that some of them were even geared towards curly hair. The prices were very reasonable so I decided to give some of the products a try again.


The products I purchased (from left to right) are:
*Sleek & Shine leave in conditioning Cream
*Triple Nutrition Spray
*Sleek & Shine intensely smooth Anti-Humidity Smoothing Milk
*Pure Clean Gel (strong hold)
*Curl shaping gel (strong hold)
I will begin by reviewing the gels.

The first gel I purchased was the Pure Clean Gel, and I was attracted to this gel because the packaging claimed that it was 98% naturally derived and that it provided 24 hour hold with no flaking or residue.
The smell of this product does smell natural, almost minty and I did like that it did not leave flakes or any white residue in my hair. This gel was also extremely easy to wash out of my hair. The issue I had with this gel was that it did not provide a good hold; if you add the quarter-size amount of product that is suggested on the packaging you won’t get any hold at all. To make this gel work I had to use quite a lot of it, (I’m talking globs), to get it to provide adequate hold. I do not think the extra strong label  lives up to its name.

The Curl Shaping Gel piqued my interest because it came in a spray bottle and I had never used a spray gel before. I thought it would make application easier and I liked that the bottle said “curl defining” on it. The packaging also claims to have nourishing shea that is suppose to help add shine.
I was wrong about the spray bottle; although I did not have an issue with the nozzle clogging up, the gel came out in big globs rather than a spray that evenly coated my hair. It also did nothing to add shine and like the other gel I needed to use quite a lot of product to get enough hold. The good thing about this gel is that it did not create any flakes or residue.

Both these gels are not bad if you are looking for a small amount of hold.

Sleek & Shine intensely smooth leave in conditioning cream: 
This product is a leave in conditioner that claims to give you 3 days of sleek hair and it is targeted at frizzy dry hair offering long lasting frizz control and shine.  It also claims that it works in 97% humidity and contains Moroccan and apricot oil.

Although there are a few oils in the ingredient list it does contain silicone for those of you who don’t use silicone based products but this did not bother me. This product smells divine! Like fruity tropical goodness. The first time I applied it, my hair felt good, soft and frizz free. A day later my hair felt dry and looked a bit frizzy. I could feel the product sitting on top of my hair, it felt a bit tacky and weighed down. I did not like how my hair felt the second and third day so I did not continue to use this product. If you wash your hair frequently, or even co-wash this might not be so bad but as days passed it caused more dryness. 
 Sleek & Shine Anti-Humidity Smoothing Milk:
This product claims to contain Moroccan argan oil to give you 24 hours of frizz control. It says it will “smooth and tame unruly hair without weighing it down.” This product also contains silicones.
This smoothing cream has that same wonderfully fruity scent that lingers all day. Although it did not weigh my hair down and make it dry like the leave in cream did, I did not really see any difference when it came to combating frizz. I usually get very little frizz but this product didn't really make any difference in my hair and definitely did not add any shine. It may work better for people who have a bit thinner hair and less dense curls. 

Triple Nutrition Spray: 
This spray is a detangler and nourish + repair leave in that is suited for dry damaged hair. This product says that it is “enriched with fruit oils that penetrate each layer of hair, the serum repairs and softens.”  It is suppose to “instantly detangle” making your hair “silky, radiant and full of life.”
As you can see from the photo the spray separates into two layers, the top layer is milky looking, like conditioner, and the bottom layer is oily in appearance. To use it you have to shake the bottle to mix the two layers.
This is the only product that I have continued to repurchase. I do not use it to de-tangle my hair because I would need half the bottle but it does give my hair extra softness and a very small amount of hold. I usually apply this product before I apply my other leave in conditioners and it works well with my other products. It does not weigh down my hair and I don't feel it sitting on top of my hair. I think it does have slightly nourishing properties and I do notice a slight difference in the softness of my hair when I use this. 

For some reason the Triple Nutrition Spray in the U.S. looks like a different formula such as the photo below.
Triple Nutrition Spray that I have seen in U.S. stores
Seems like a different formula and packaging. 


Wednesday, March 13, 2013

Color Essence Quick Dry Nail Polish Review


Color Essence is a rather small cosmetics company compared to many big name brands that are popular in stores. Here in Canada the selection is very minimal and I can only find a fraction of the products that are available on the Color Essence website.
 I own a few different items from this brand including their eye liner, mascara, blush, lipsticks and eye shadows and for a lower end brand their products tend to be pretty good.

In the U.S. you can find Essence cosmetics in Ulta and here in the Greater Toronto Area the brand is available at Shopper Drug Mart. Shoppers Drug Mart usually has a small display tucked away somewhere in the store. If you would like to check out their website you can find it at: http://www.essence.eu/us/usa/fm0/home.html

Color Essence sells affordable cosmetics at a fraction of the price with some items starting at just $1.50.  The nail polishes that I am going to review in this post were about $2.50 each.


 I will begin by naming all my polishes in the photo above from left to right
#05 Sweet as Candy (sheer pink)
#08 Ultimate Pink
#39 Lime Up!
#86 A Lovely Secret (pastel lavender color with purple flecks)
#26 Break Through (medium toned deep purple)
#98 Walk On Air (deep blue)
#53 You Belong to Me (pastel mint green color)
#34 Walk Of fame (brown taupe color)
#46 Wake Up (vibrant orange)
#55 Let’s Get Lost (vibrant sky blue color)

I love the color range of this nail polish line. They range from neon colors, to bright and vibrant colors and even subtle and earthy toned hues. These polishes come in small bottles but the fact that they are fast drying was a big selling point for me. They also do not test on animals which is also a bonus.

The polishes apply rather opaque and they are easy to apply. Most of the polishes only require 2 coats and they do dry rather quickly. They give off a slightly glossy finish and the brush is rather standard and easy to work with. I like that the formula is rather thick as opposed to thin and runny.

I find that for the price these polishes are of good quality and with a good top coat I have gotten one whole week wear without any chipping. With any nail polish, chipping also depends on how much you use your hands. If you are doing a lot of work with your hands you may not get as much wear out of your polish.

These polishes are great for all seasons and they look good as part of a manicure or pedicure. I have no issues with the polish bubbling on my nails and they do not stain.


My favourite pink color thus far including all polish brands I have tried is #8 called Ultimate Pink. This pink definitely lives up to its name and with a top coat it looks bright and extra glossy which I love.


My second favourite color in this line is #46 called Wake Up, which is a vibrant orange color and the best orange color I have found throughout all nail polish brands.


If you like pastel colors then you will love the colors You Belong to Me and A Lovely Secret which are colors I love for the spring time. 


Tuesday, March 12, 2013

How to Deep Condition Your Hair


Deep Conditioning Treatments

Out of all the treatments I do for my hair the most beneficial and moisturizing are deep conditioning treatments. I think most hair types can benefit from the restorative outcomes of a good deep treatment especially those like me who have naturally curly hair which tends to be on the dry side. Since I have begun doing deep treatments every week my hair is soft, bouncy and moisturized. These treatments have also helped me prevent split ends and breakage allowing me to maintain the length and health of my hair.

my hair  naturally curly
The amount of time you deep condition your hair will depend on your hair’s needs. If your hair is very damaged then you should try to deep condition your hair more often (2 times per week) and for longer amounts of time. If your hair is less damaged but it is still on the dry side than once per week is adequate. And if your hair is very healthy you can deep condition to maintain its health about once per month.

Step 1 (optional): 

Some people like to do an oil treatment before they deep condition their hair. I do this strep occasionally when I want to add the benefits of natural oils to my treatment process. 

-Before you wash your hair dampen it with water or with water and a light conditioner from a spray bottle. I find that mixing the oil with a conditioner helps it glide through my hair much easier.

-I sometimes also add organic honey to my conditioner instead of oil.

- After your hair is damp saturate your hair with a natural oil of your choice. This could be organic coconut oil, olive oil, macadamia oil, avocado oil, grape seed oil ect.

-Put your hair up in a plastic shower cap and leave the oil on your hair for as long as possible. I usually leave the oil in for 2-3 hours but you can leave it in overnight if you plan to wash your hair in the morning.

Step Two:
-Wash your hair with your favorite shampoo, I use a sulfate free shampoo because it is less harsh and does not strip my hair. I would recommend lathering and rinsing twice to make sure that all the oil is washed out. 

Step Three:

-Part your hair (I usually part my hair in half), and then saturate your hair with a de-tangling conditioner. The more slippery feeling the conditioner makes your hair the better because it will cause less damage and make the de-tangling process much easier.

-Start at the ends of your hair and begin de-tangling with a wide tooth comb, pick apart the tangles slowly making your way upwards towards your roots.  Remember to be gentile!

Step 4:
-Clip your hair up leaving the conditioner in your hair for a few minutes and rinse it out after you have finished doing all your other shower things such as washing the rest of your body.

-When you rinse the conditioner out try using cool water.

Step 5 Deep Conditioning:

When you deep condition your hair there are several methods you can use. I am going to explain a few methods that you would use as step 5. When applying your deep conditioner always apply liberally to the ends and the areas of your hair that need the most moisture.

Using natural warmth:
If you do not want to use any heating device to help with your deep conditioning treatment you can use the heat from your own head.

-Apply the deep conditioner to your hair and cover your hair in a plastic cap

-cover the plastic cap by wrapping your head in a towel (I use a microfiber towel). The towel traps in the heat from your head and warms the hair, the longer you do this the warmer your head becomes. I usually do this for about 2 hours.

In shower deep conditioning treatment:

One of the ways you can deep condition your hair for a few minutes is by doing it in the shower. This method is fast and easy for the days when you just don’t have hours to spend doing your hair.

-After you  have shampooed and de-tangled and you have washed the de-tangling conditioner out, apply your deep conditioner in the shower. If your deep conditioner is a good de-tangling conditioner then you can use it for both steps and do not have to rinse it out.

-Clip your hair up with the deep conditioner in and turn the water on so that it is very warm and creates a steam. Do the rest of your washing while you let the conditioner sit in your hair.

I consider this method a deep conditioning treatment because the heat and steam allows the hair to absorb the benefits of the deep conditioner resulting in very soft and moisturized hair. I usually do this for about 5-10 minutes. 

Hot towel method:
-Using this method you would apply your deep conditioner, pin up your hair and then warm up a wet towel in the microwave for 1.5-2 minutes.

-When the towel is warm wrap it around your head and leave it on for 10-20 minutes.

The only problem I have with this method is that the towel tends to cool down very quickly and sometimes I find myself having to re-heat it.

Using a blow dryer:

-With this method you will apply the deep conditioner to your hair and cover your hair with a plastic cap.

-Next you will use your blow dryer on a hot setting and move the blow dryer around your head to warm up the cap and your hair. The heat will not be making direct contact with your hair and therefore is not damaging.

You can do this for as much time as you think your hair needs. I do this for at least 15-20 minutes.

Using a dryer attachment:
This is the method I use most often because it is rather simple. I purchased my Conair dryer attachment for about $12 at Sally’s Beauty Supply Store. You also need a blow dryer for this cap to work.

-After applying your deep conditioner put all your hair in a plastic cap

- Attach your blow dryer to the dryer attachment hose, place the dryer attachment cap on your head and turn your hair dryer to the low heat setting.

I usually use the dryer attachment cap anywhere from 30 minutes to 1 hour (this time can be adjusted depending on your hair's needs)

Using a hooded Dryer:

If you have a hooded dryer you can use this for your deep treatment.

-Apply your deep conditioner and cover your hair with a plastic cap.

-Sit under your dryer as long as you feel is necessary. I find that with these dryers if you sit under them too long it makes your hair a bit stiff and dries out all the water so I would suggest to use it for 30 mins before rinsing. 

Using a hair steamer :

Hair steamers are becoming more popular these days. Instead of using dry heat like the heat from hooded dryers and blow dryers hair steamers use hot steam from the apparatus which may be more beneficial since steam is water and water is moisturizing to hair. Many hair steamer brands claim to be 5 times more effective than other deep treatment methods.

-Apply your deep conditioner, pin your hair up and sit under the hair steamer as long as you feel is necessary. 

Using a clothes steamer to deep condition your hair:

If you do not have a hair steamer handy you can try using your clothes steamer. I have used my small travel steamer which worked well for a deep treatment using steam.
If you are going to try this please use caution as the steam from steamers can get very hot and burn the skin. You can control the heat of the steam by holding the steamer further away from your head. I have the Emerson travel steamer but all steamers are different and may heat up differently so if your steamer is too hot then do not try this.

- Allow the steamer to heat up and produce steam

-Make sure you wrap a towel around your neck and shoulders and protect your arms as steamers can sometimes drip hot water which may cause burns

-After applying your deep conditioner and pining up your hair move the steamer around your head allowing the steam to pass over the hair.

-Do this for as long as you feel necessary.

After you have deep conditioned your hair rinse with cool water and style as usual.

Monday, March 11, 2013

MUST-HAVE Items for Every Woman's Closet

Guest blog written by: Amanda Ali
You can find Amanda on Twitter @amandaanne86
Creating the perfect wardrobe is a challenge that most women who aren't blessed with a handy personal shopper and stylist face at some point in their lives. It may often feel that no matter how much clothes you buy, you never have enough...or that you are forced to run panicking to the mall the day before a party or interview to buy a new outfit.

The trick to creating a wardrobe that will stand the test of time is to add clothing and accessories that

1) Reflect the changing seasons
2) Reflect your personality
3) Are of good quality that can be re worn and reused
 4) Can be mixed and matched
5) Reflect the recurring events in your life (e.g. work, parties, day to day errands, dates etc.)
6) Are staples for every wardrobe. 

My following guest blog post will focus on the staple items that should be in every woman's closet.


Tops: 
1) Tank tops and t-shirts - these are essentials for layering
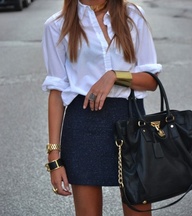
2) A white blouse - choose one that buttons up the front
3) A cashmere sweater


Bottoms: 
1) The perfect fitting jeans - it may be a long and difficult search, but it is well worth the reward. There are many articles online or in magazines that will tell you how to go about choosing the right fit for your body type.
2) A pencil skirt - this should be form fitting and above the knees
3) A flattering pair of black pants - Make sure that they are form fitting so that you can wear them to the office as well as out on the town
4) A pair of sweatpants and/or jeggings/leggings 
5) A jaw dropping miniskirt


Outerwear: 
1) A black blazer - blazer's are versatile and can be thrown on quickly to take any outfit from casual to dressy and professional instantly. Make sure that it is fitted to your body.
2) A cute little cardigan - this item can be worn with anything and is great to always keep within reach
3) A leather jacket and/or trench coat

Shoes: 
1) Classic black pumps
2) Ballet flats
3) Multipurpose boots - think a cross between boots you can wear to run errands AND a night out....once again the long and difficult search is worth it.

Dresses:
1) A Maxi Dress 
2) A cute little summer dress
3) A little black dress
4) A cocktail dress
5) A formal dress

Accessories: 
1) A bag you can fit your whole life into - choose a bag in a standard colour that you can see yourself carrying every day. It should be large enough to fit everything you need on a daily basis, but still look like a purse and not a briefcase or travel bag. you should make sure the bag is real leather.

2) A bold scarf - opt for bright colours or bold patterns to give any outfit a lift 
3) A necklace and pair of earrings - (does NOT have to match) but it does have to make a statement. A pearl necklace is always a good choice, but it can be whatever you prefer
4) A pretty clutch - I prefer envelope clutches but it is a personal preference. However, stay away from the tiny clutches where you can only fit a pack of gum and a lipstick.
5) A great pair of sunglasses that compliments your face and looks trendy.


Related Posts Plugin for WordPress, Blogger...